

As you saw in the last article (Greenhouse build part 1), we moved a lot of dirt with the skid steer. We had to get a mostly flat spot in the yard in order to start the actual greenhouse build. On to the next steps…
Orienting –
In the northern hemisphere the sun is always coming from the south (in varying degrees depending on the time of year). We all know that you want the main glazing body (windows made of plastic or glass) facing towards the sun in a passive solar greenhouse. In southern Colorado, however, you don’t want the greenhouse facing true south as that would allow too much sun/heat during the summer months, and not enough during the winter. The fix, orient the greenhouse slightly south-east (just a few degrees (between 3-7) goes a long way here) with glazing on the south and east sides to allow for morning sun/heat and blocking or reducing the sun/heat on the west side in the afternoon.
Climate battery / thermal mass –
The ability to circulate the greenhouse air underground to allow for heating/cooling/humidity dissipation is a major win.

Converting the space under the greenhouse into a thermal mass will help meet the above goals. This was all about digging a large hole. 11′ long x 8′ wide x 4′ deep to be exact. This was started by marking off space with spray paint and using a pick ax and shovel to get it started. We quickly realized the soil that we were digging in was still pretty heavily compacted (as this was under 3+ feet of dirt two days earlier. Time to bring in some reinforcements. A mini excavator was rented to complete this task (look at all of the new equipment I get to learn how to use, wee).
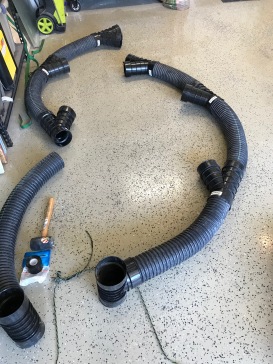
Once the hole was dug out, that, unfortunately, meant no more small heavy equipment rentals, everything from this point forward everything is again done by hand. Once this was dug down, it was time to layout the 4″ perforated pipe for air flow.

Now that the perforated pipe layout is complete, we get to cover that 5″ deep with of 2″ rock. 95 bags of rock later, hauled from my driveway through to the far corner of the backyard. The hoses are buried in with rock, and ready to move on.


Pipe check, rock check and now onto refilling the hole with dirt. Simple enough, replace all of the dirt that was removed. Easier said than done when doing it by hand btw.

Stay tuned for more!
If you enjoyed this article, please Like, share and comment.


2 thoughts on “Greenhouse build part 2”